When people imagine engraving, they often picture simple initials on a wooden box or a logo on a glass. But today’s engraving tools can do far more intricate work. From delicate floral patterns on acrylic to detailed portraits on stone, engraving has grown into a craft that combines precision technology with creative expression. The challenge, of course, is figuring out how to bring complex designs to life on materials that all behave differently under the tool.
If you’re curious about the process and want a structured guide that doesn’t just skim the surface, this step-by-step breakdown will help. I’ll share the methods, common pitfalls, and practical tips you need to engrave like someone who knows what they’re doing.
Understanding the Basics Before You Start
Engraving is essentially about controlled removal. Whether you’re using a handheld tool or a high-tech machine, the goal is to etch away just enough of the surface to reveal your design without damaging the material. The tricky part is that wood, metal, stone, and glass all respond differently to pressure and heat. That’s why beginners often get uneven lines or faint marks—the material simply isn’t reacting the way they expect.
So, before you even switch on your tool, think about these key aspects:
- Material hardness ─ Softer woods and plastics will cut faster, while stone or steel require patience and proper settings.
- Design complexity ─ A bold monogram may look good on nearly anything, but a detailed landscape drawing requires high resolution and fine settings.
- Tool control ─ Machines do a lot of the heavy lifting, but setup is everything. With manual engraving, your hand stability is the deciding factor.
This foundation saves time later when you’re knee-deep in files, stencils, or machine calibrations.
Choosing the Right Engraving Method

Here’s where the real fun begins. The engraving world has moved far beyond chisels and burins. These are the most common methods used for complex designs:
- Hand engraving ─ Old-school, beautiful, but slow and requiring years of practice.
- Rotary tools ─ Affordable and versatile, great for small projects, though less precise on complex details.
- Etching with chemicals ─ Works especially well for metals, but comes with safety concerns.
- Laser engraving ─ The modern favorite, capable of producing crisp, repeatable designs with minimal effort once set up properly.
If you’re serious about precision, you’ll likely find yourself leaning into laser engraving. The technology available at TOOCAA allows you to engrave on wood, acrylic, glass, stone, and metal, often without needing to change tools. For beginners, it’s also more forgiving: once you learn the settings, you can replicate complex designs with consistency.
Preparing Your Design for Engraving
The preparation phase often makes or breaks a project. A design that looks stunning on your computer screen can fall apart when translated to wood grain or marble veining.
Here’s what to keep in mind when prepping your artwork:
- Vector over raster ─ Complex designs work best when created in vector formats (like SVG or AI files). They scale without losing sharpness.
- Simplify wisely ─ Too many thin lines or micro-details may disappear once engraved. Adjust the thickness so that every element stands out.
- Consider contrast ─ Light wood vs. dark wood, transparent glass vs. colored acrylic, contrast determines how visible the final design will be.
- Test runs are gold ─ Always do a small engraving on scrap material before committing to the full piece.
Think of this stage as dress rehearsal. The more you iron out ahead of time, the less painful the final act will be.
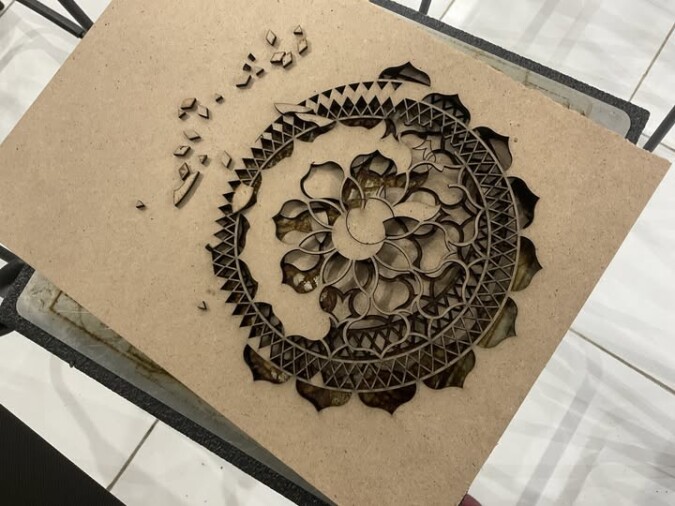
Step-by-Step ─ Engraving on Different Materials
Each material brings its own quirks. Let’s go through them one by one.
Engraving Wood
Wood is forgiving, which makes it great for beginners. The key issue is grain direction, your lines may look jagged if you fight the natural flow.
- Settings ─ Medium speed, moderate power for laser or rotary tools.
- Tip ─ Stick to hardwoods like maple or cherry for complex designs. Softer woods tend to char or produce fuzzy lines.
- Best uses ─ Plaques, decorative boxes, furniture accents.
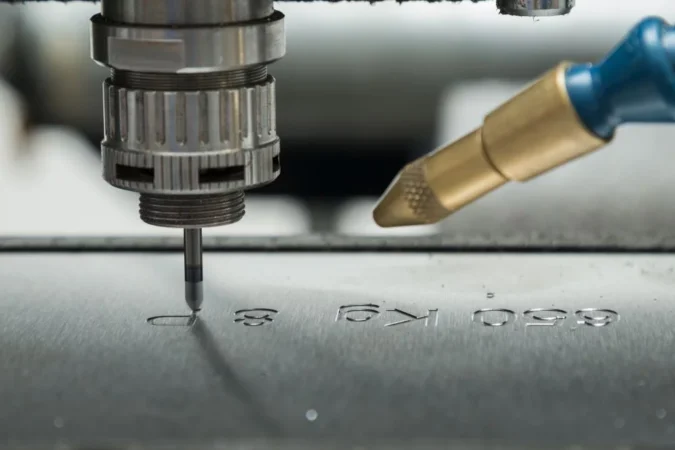
Engraving Metal
Metal requires precision and patience. Aluminum and brass are easier than steel.
- Settings ─ Slower speed, higher power. Use multiple passes if needed.
- Tip ─ Apply marking spray or anodized coating when engraving with lasers to enhance contrast.
- Best uses ─ Jewelry, tools, custom hardware.
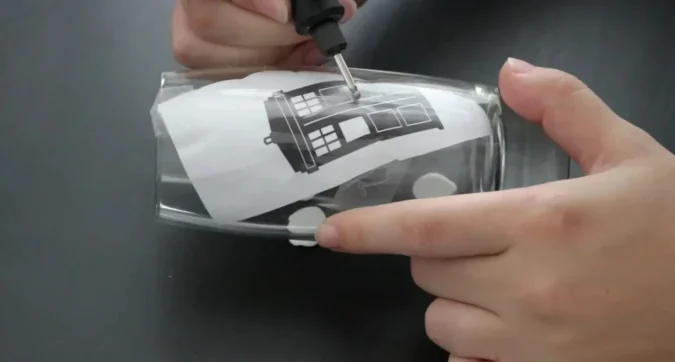
Engraving Glass
Glass is both delicate and rewarding. It doesn’t “cut” as much as it frosts under engraving.
- Settings ─ Lower power, high resolution, avoid prolonged heat exposure.
- Tip ─ Apply masking tape to reduce chipping and give smoother edges.
- Best uses ─ Wine glasses, trophies, decorative panels.
Engraving Stone
Stone is challenging but dramatic when done right.
- Settings ─ Slow speed, high power, multiple passes.
- Tip ─ Slate and granite give the best results. Polished marble may need surface treatment first.
- Best uses ─ Memorial plaques, coasters, garden signs.
Engraving Acrylic and Plastics
Plastics respond differently depending on their composition. Cast acrylic engraves cleanly, while extruded acrylic tends to melt.
- Settings ─ Medium speed, moderate power, good ventilation.
- Tip ─ Test small samples since plastics vary wildly in composition.
- Best uses ─ Signage, decorative panels, light-up displays.
Common Mistakes to Avoid
Even experienced engravers slip up. Here are pitfalls you can dodge:
- Skipping scrap tests ─ Every new material batch behaves slightly differently. Testing saves costly mistakes.
- Wrong resolution ─ Using low DPI settings on a highly detailed design leaves you with muddy results.
- Poor cleaning ─ Dust, oil, or fingerprints can distort engraving quality.
- Ignoring safety ─ Ventilation for plastics, goggles for glass, gloves for metal ─ basic, but often overlooked.
A little caution upfront keeps your workshop from turning into a regret factory.
Final Thoughts
Engraving complex designs isn’t just about operating a tool. It’s about understanding how materials react, preparing designs thoughtfully, and adding a touch of creativity. Whether you’re experimenting with wood at home, tackling glassware for gifts, or setting up shop with professional tools, the process is both technical and deeply rewarding.
Start small, make mistakes, and learn as you go. That’s the step-by-step journey every engraver takes. And in the end, it’s not only the finished design that matters, but the sense of pride when you realize that something as solid as stone or as fragile as glass now carries your personal imprint.